Free Virtual Data Room - Pydio/Cells
 Posted on Thu 31 March 2022 in Administracja
• [4 min read]
Posted on Thu 31 March 2022 in Administracja
• [4 min read]
Adnotacja z 2026: artykuł nigdy nie dokończony
Few years ago I built a VDR for a hotel developer. It was a simple repository for documents, with simple permissions: one administrator and many users with read option. Later it got a bit more complex, but not too much so. The repository was operated by vsftpd and the sharing was made possible by Apache. This is still working today. The main disadvantage of this system is the susceptibility to human error - you have to set up access groups and users very carefully.
Recently someone who knew my old VDR asked if it's easy to do because he wanted to have his own. I said yes and no, and that the configuration was messed up. And I decided to find something better.
Once I did something for a company from Switzerland which had bought hosting, and one of the services available from one click was Pydio. Just a simple VDR.
Today it's a really mature product and it has a container version, so I decided to check it out.
I insisted that I will use Portainer because it's very convenient when it comes to container handling.
I put Portainer on a virtual machine with IP: 192.168.1.8. I had Ubuntu 21.10 on it so installing Portainer comes down to:
docker volume create portainer_data
docker run -d -p 8000:8000 -p 9443:9443 \
       --name portainer --restart=always \
       -v /var/run/docker.sock:/var/run/docker.sock \
       -v portainer_data:/data \
       portainer/portainer-ce:2.11.1
At this step I don't care about SSL certificate and ports and after a few seconds I have the GUI of the Portainer (remember my VM has IP 192.168.1.8):
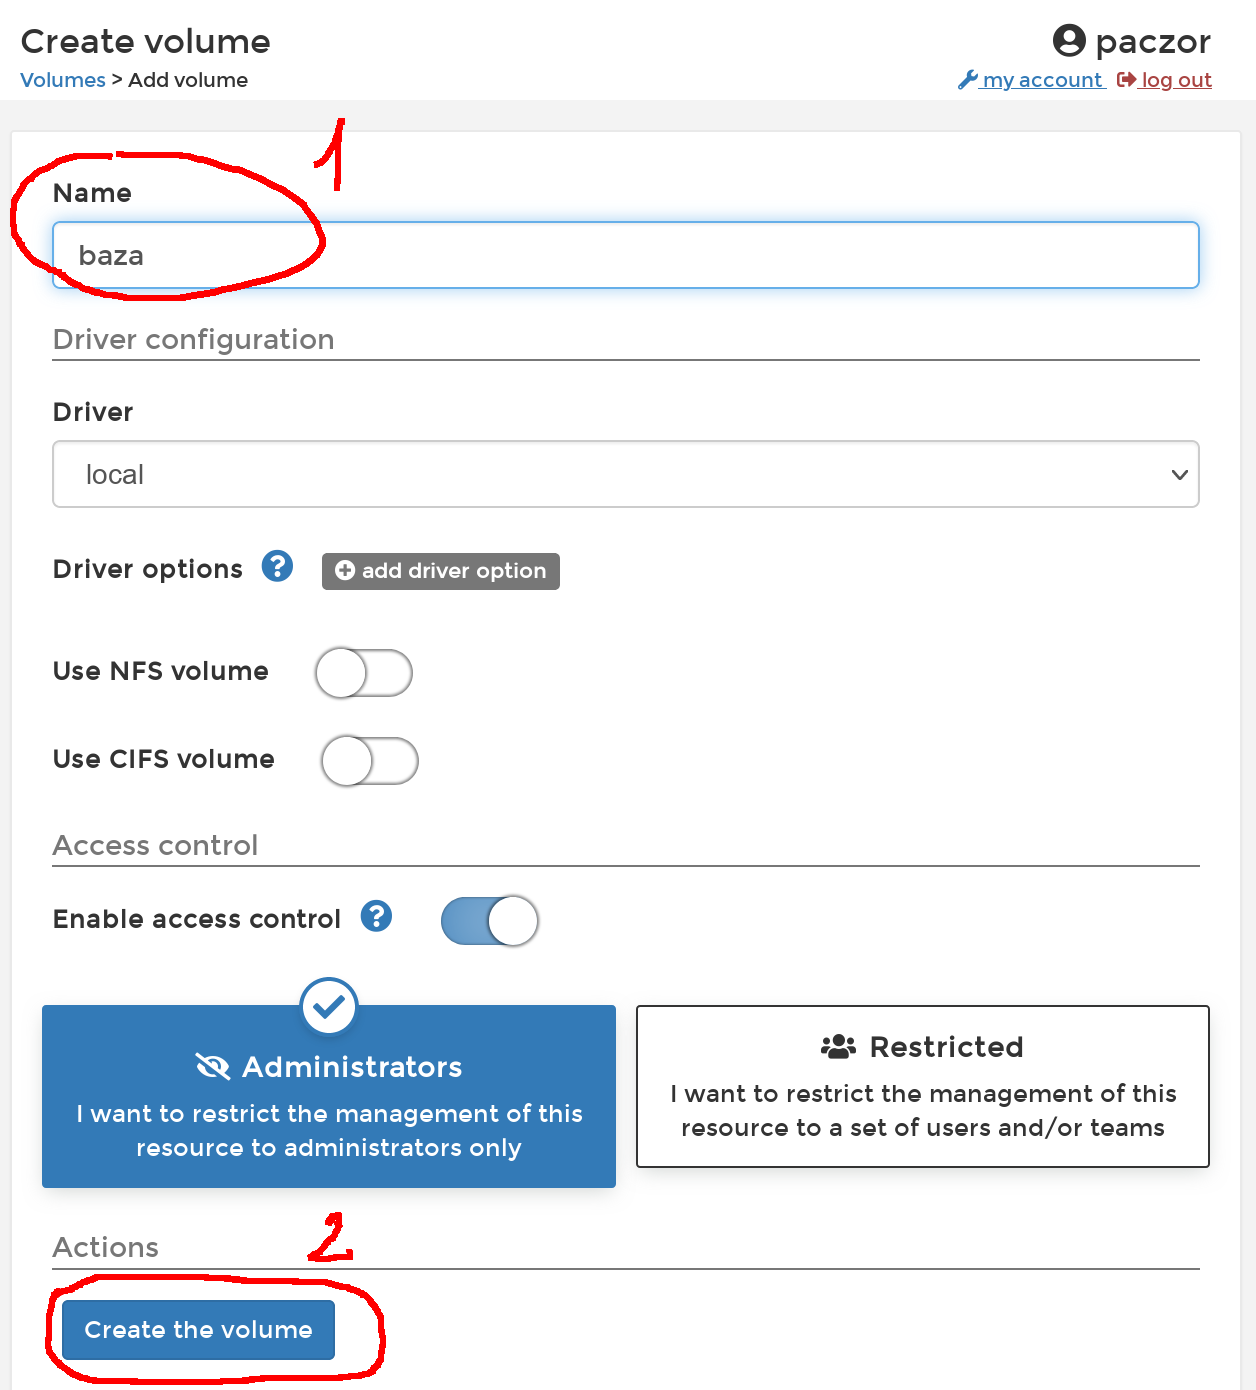
In the Portainer I choose Volumes -> Add Volume, I name the volume for example "baza".
At the end I click "Deploy the container".
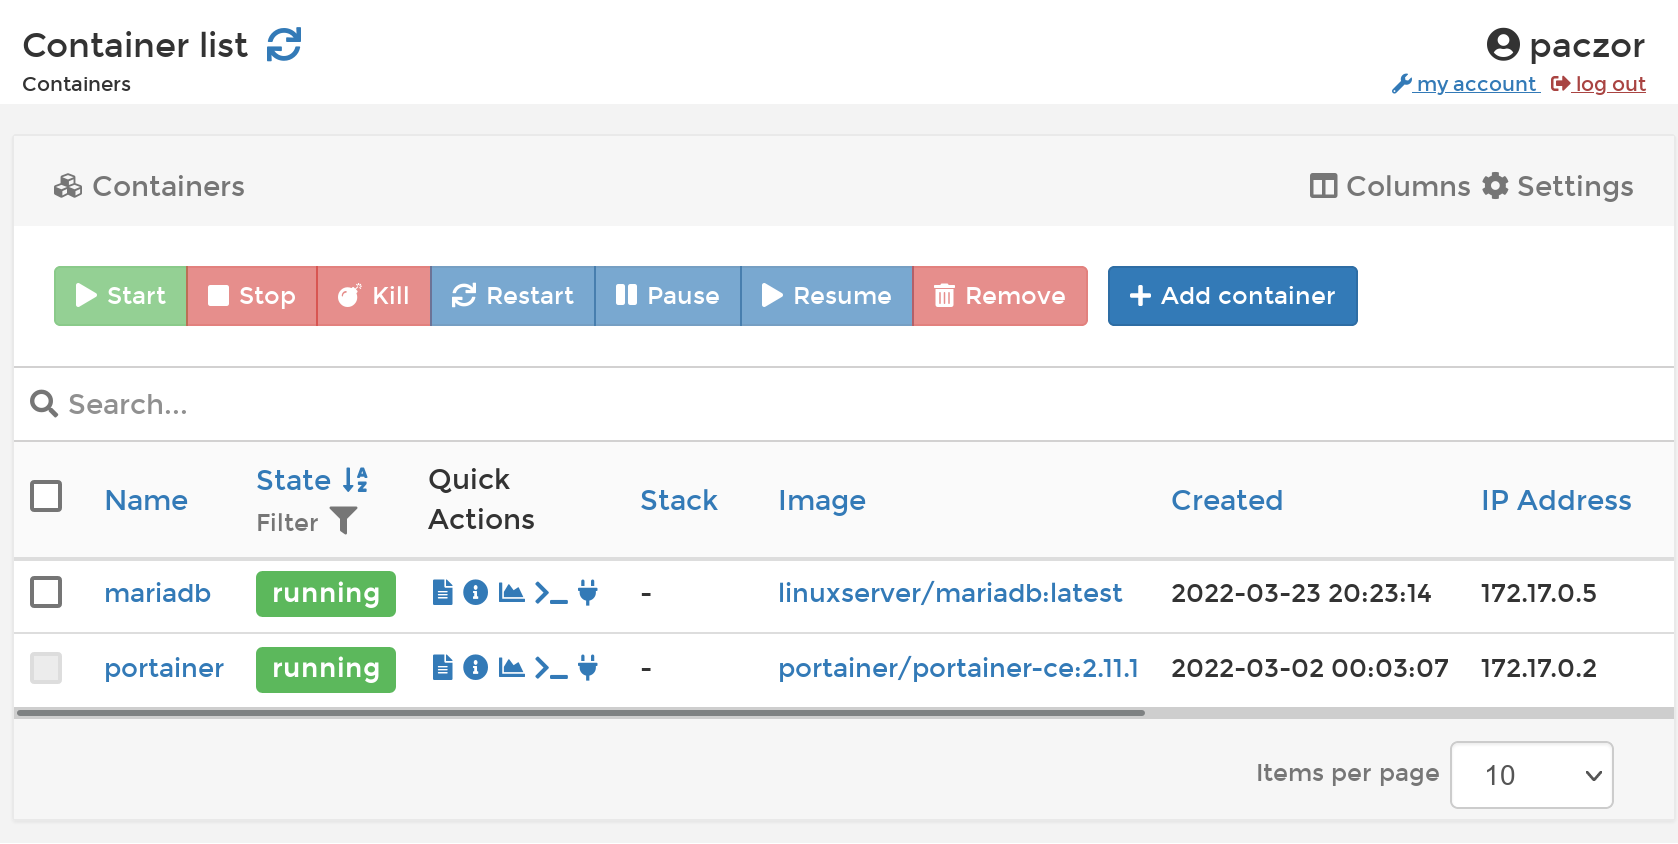
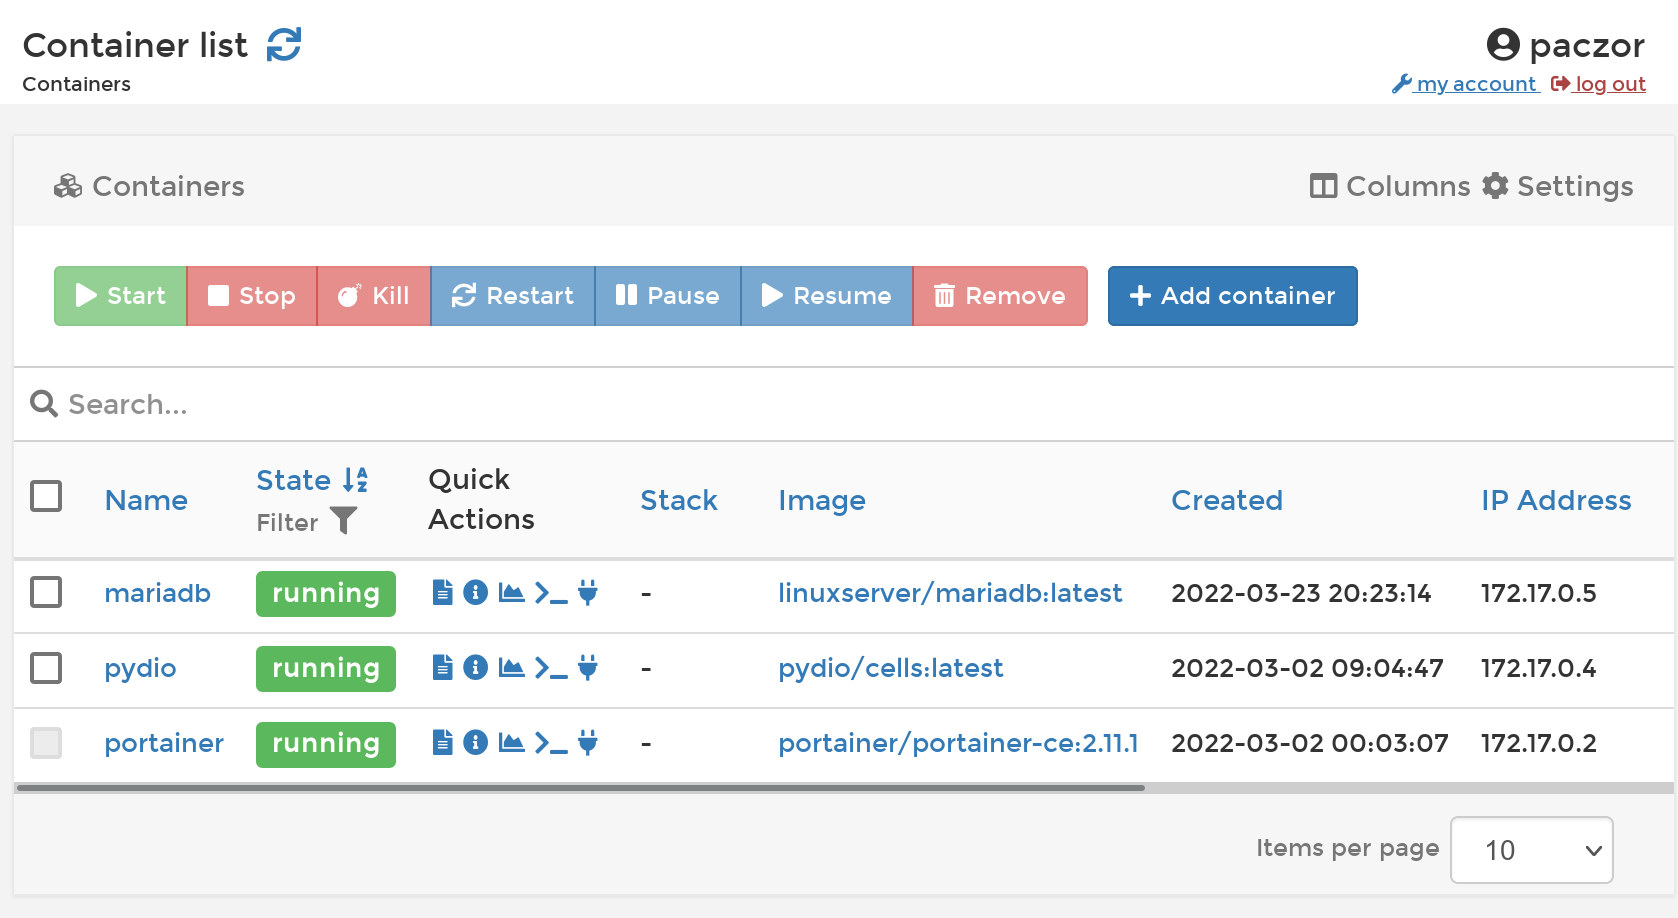
When the image has finished downloading and the container starts running in the Portainer Containers tab you can see what IP address our database has. In my case it is for example 172.17.0.4, and MariaDB is running on default port 3306.
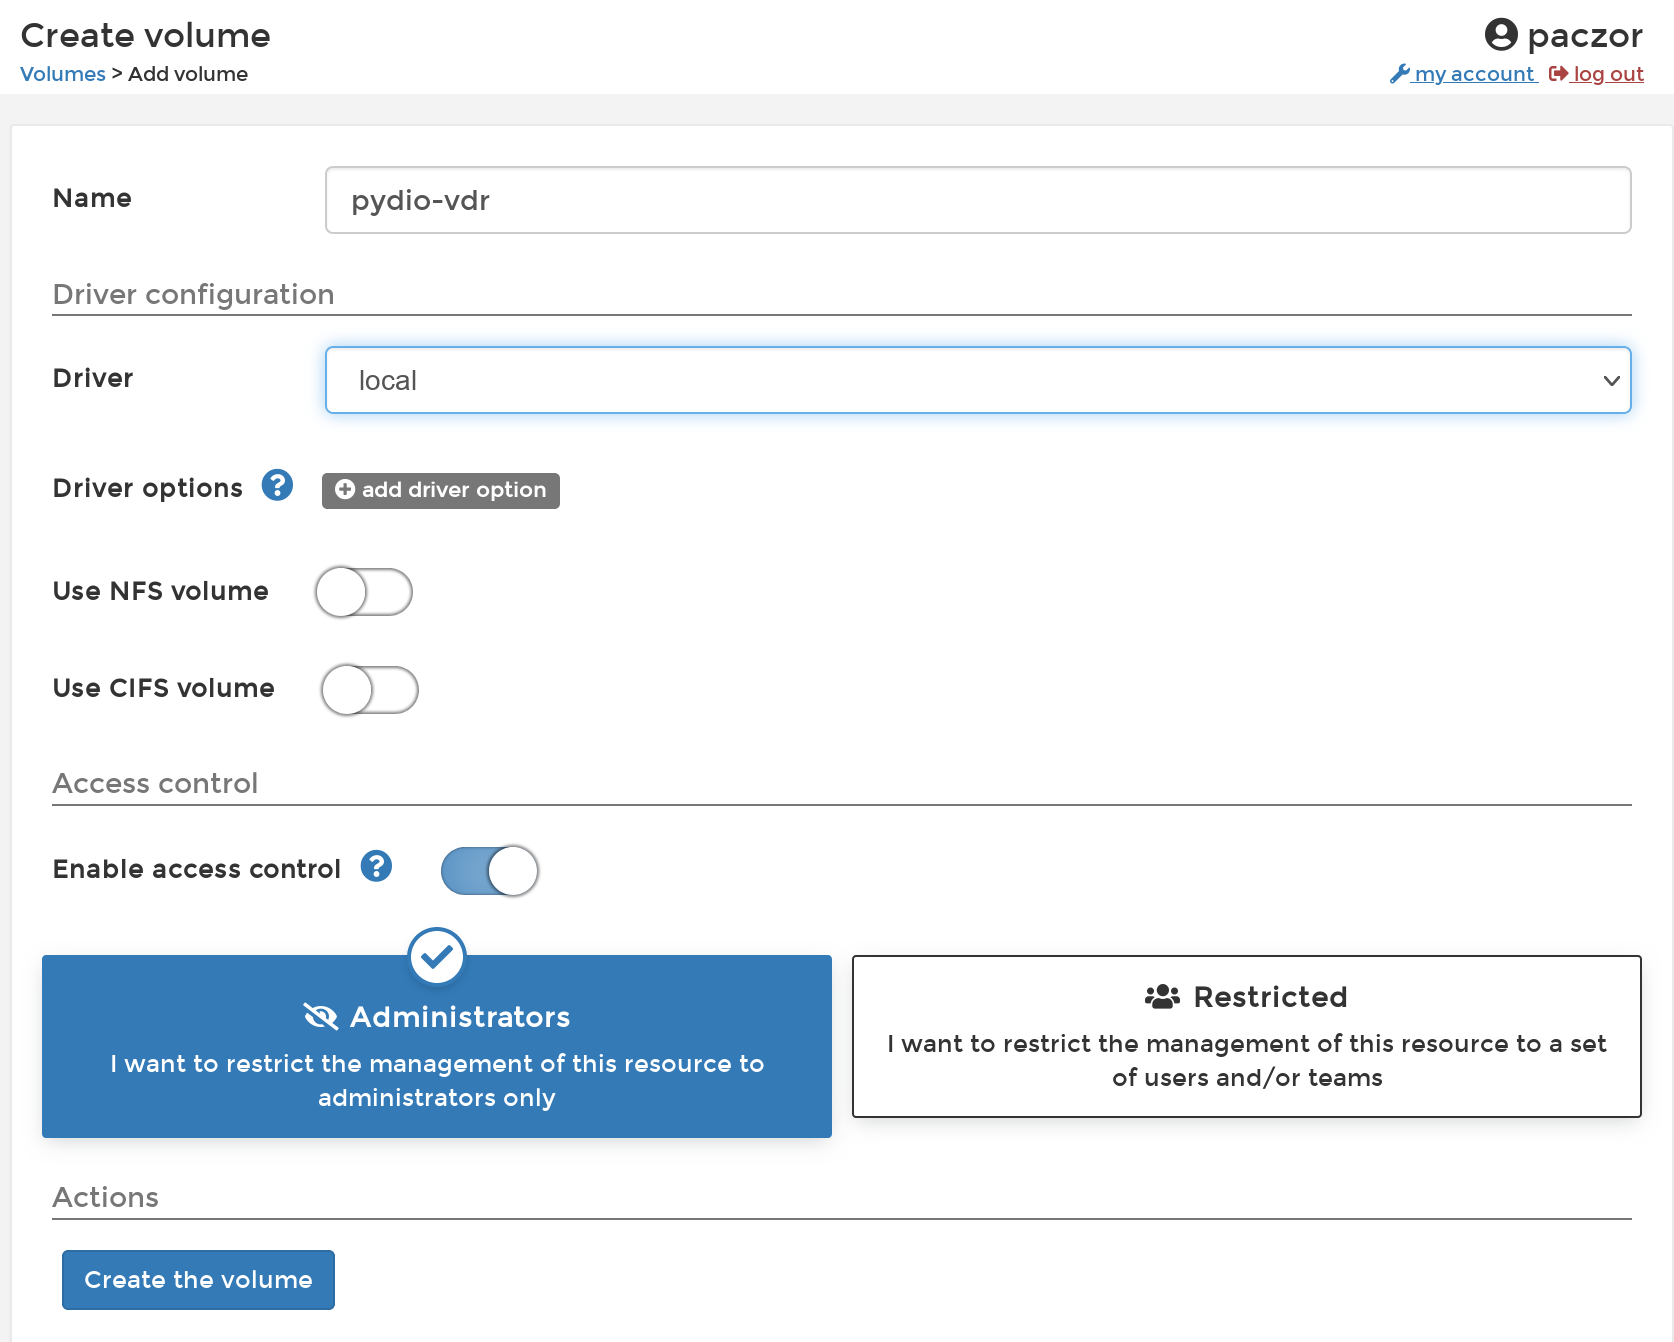
I choose Volumes -> Add Volume, I name the volume for example "pydio-vdr".
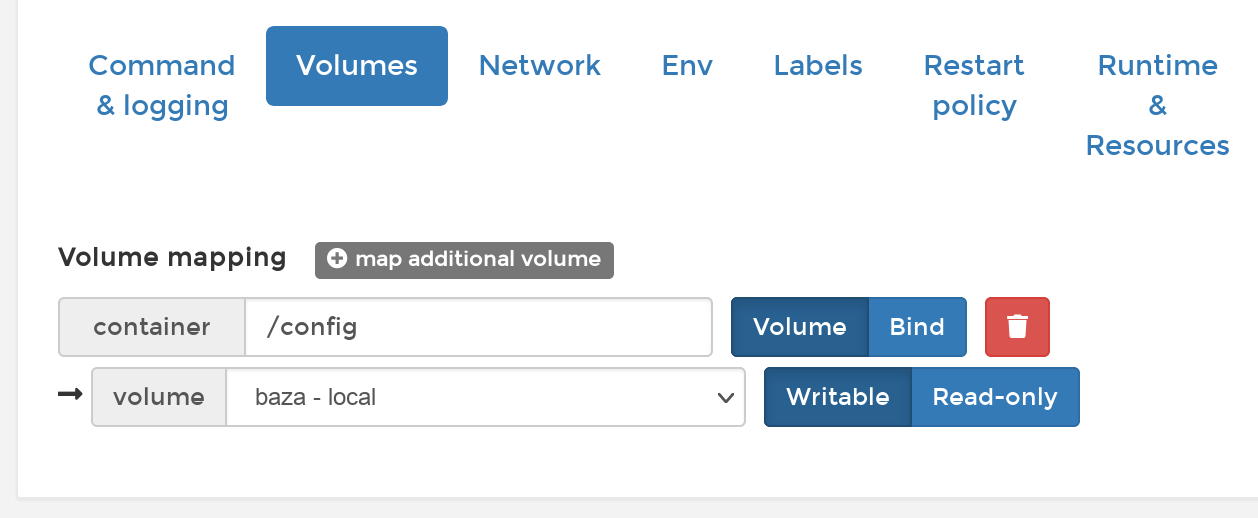
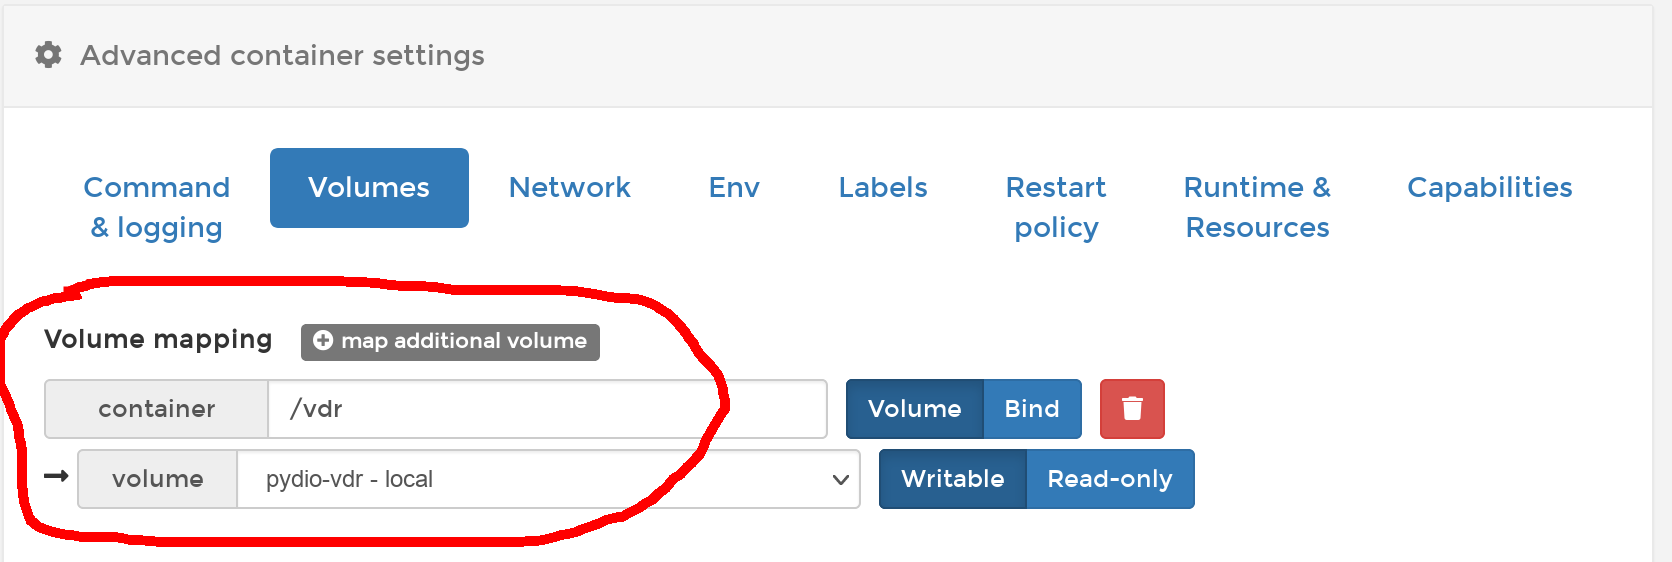
I also map the created volume "vdr".
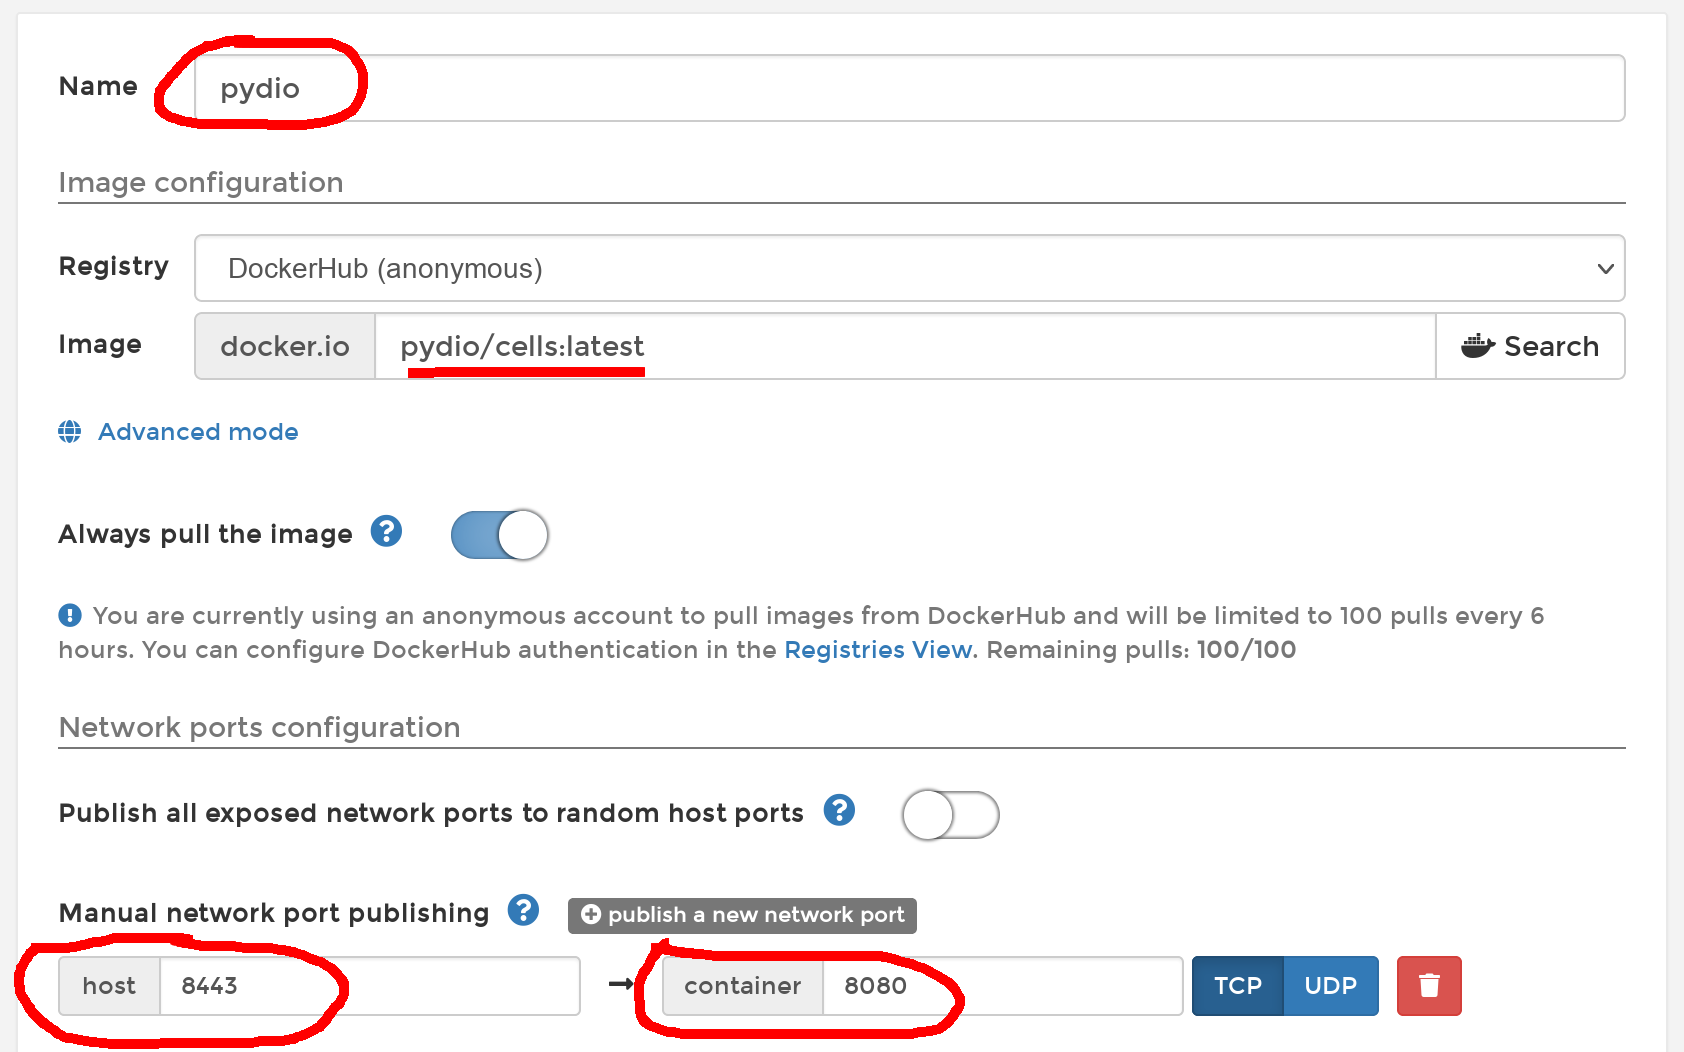
Finally I click "Deploy the container" and after a while at: https://192.168.1.8:8443 I have the Pydio installation page. In the appropriate fields I enter the data to connect to the database, that is, as host 172.17.0.4 and the password.
The installation itself is simple, it's a few fields to fill in and clicking on "Next", so I won't elaborate.
Here's how the Portainer GUI should look like:
If not for the fact that my Portainer machine is behind a firewall this would be the end of the job. However, I still need to use a reverse proxy to get to the machine through the public address.
Here are the redirect rules in firewall:

Log in to the webserver and set up proxy as follows:
<VirtualHost *:80>
    ServerName vdr.dupa.pl
    Redirect / https://vdr.dupa.pl/
</VirtualHost>

<VirtualHost *:443>
    ServerName vdr.dupa.pl
    AllowEncodedSlashes On
    SSLEngine on
    SSLProxyEngine  On
    ProxyPreserveHost On
    ProxyRequests off
    Loglevel debug
        ProxyPassMatch "/ws/(.*)" wss://192.168.1.8:8443/ws/$1 nocanon
    ProxyPass / https://192.168.1.8:8443/ nocanon
        ProxyPassReverse  / https://192.168.1.8:8443/ nocanon
        ProxyRequests off
    SSLCertificateFile /etc/letsencrypt/live/vdr.dupa.pl/fullchain.pem
    SSLCertificateKeyFile /etc/letsencrypt/live/vdr.dupa.pl/privkey.pem
    Include /etc/letsencrypt/options-ssl-apache.conf

    <Location />
        RequestHeader set X-Forwarded-Proto “https”
        RequestHeader set X-Forwarded-Port “443”
    </Location>
</VirtualHost>
I have the proxy on Apache because that's where Apache is and I'm not going to move everything to nginx now.
First I generate Let'sEncrypt certificate for vdr.dupa.pl.
I kill Apache:
sudo systemct stop apache2
sudo certbot --certonly --standalone -d vdr.dupa.pl
In /etc/apache2/sites-available I have the vdr.dupa.pl.conf configuration file:
ServerName vdr.dupa.pl SSLEngine on SSLProxyEngine On ProxyPreserveHost On ProxyRequests off Loglevel debug ProxyPass / https://192.168.1.8:8443/ SSLCertificateFile /etc/letsencrypt/live/vdr.dupa.pl/fullchain.pem SSLCertificateKeyFile /etc/letsencrypt/live/vdr.dupa.pl/privkey.pem Include /etc/letsencrypt/options-ssl-apache.conf ProxyPassReverse / RequestHeader set X-Forwarded-Proto "https" RequestHeader set X-Forwarded-Port "443" . .
sudo a2ensite vdr.dupa.pl.conf
sudo systemctl start apache2
I go to https://vdr.dupa.pl and…
500 Internal server error
Oh dear! In the Apache logs you can see what happened, the proxy establishes an https connection with Pydio but the certificate doesn't match, no wonder.
The easiest way is: generated certificate and key for domain vdr.dupa.pl I copy myself gdz